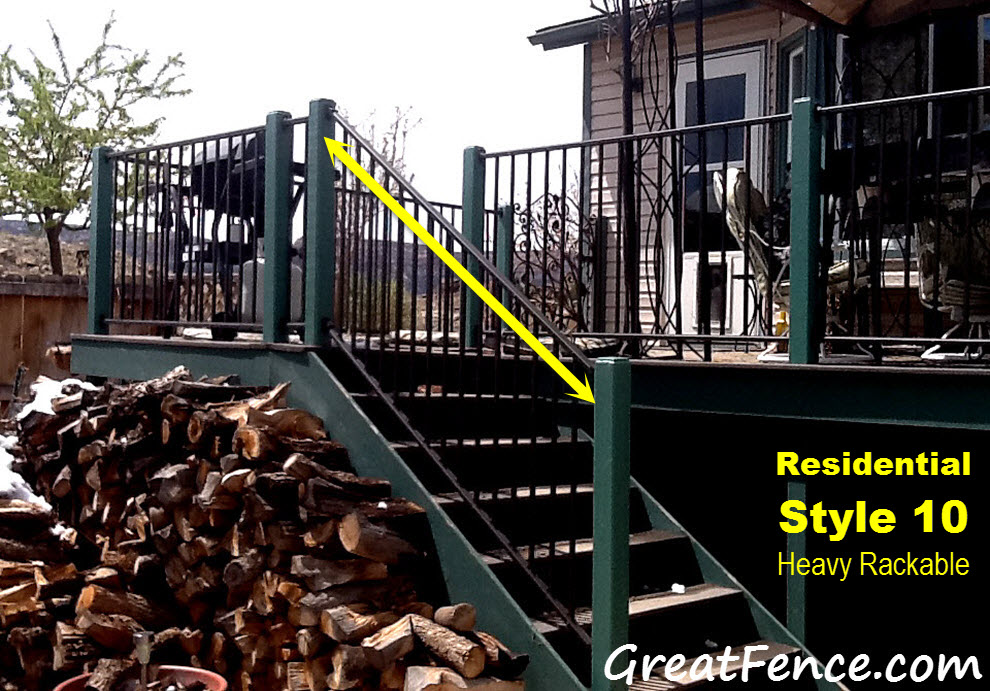
Fence Panels can be configured online for slight, medium and large slopes. And stairs. Always check your local building codes because some jurisdictions require a super-heavy duty product like our ICC Code Compliant Deck Railing for any porch, deck, or balcony 30 inches or higher off the ground. Therefore, they may also require this for stairs.
Back to aluminum fence panel racking — it’s one of the many benefits of aluminum fence vs. steel. Aluminum fence is easier to ship and easier to install. Racking means you can shift the fence section, on-site, during the installation process so that it angles to the grade of your slope. The vertical pickets stay vertical (straight up and down), but the horizontal rails angle. This is very easy to do, even by the average layperson.
When configuring your fence panel(s), you want to think of your property boundaries in 5, 6, 7 foot stretches for Residential. And 6 foot and 8 foot stretches in Commercial and Industrial. These lengths correspond to the fence panel widths available in each of the 3 grades, respectively. Let’s say one of your fence runs was 30 feet. And the rise/fall over that 30 foot span = 2 feet. Well, you would order all of your panels: Standard Configuration because standard configuration allows you to “rack” each section up to approximately 6 inches per panel. And if you have 5 panels in a straight run (30 / 6), then 6 inches of racking should easily work.
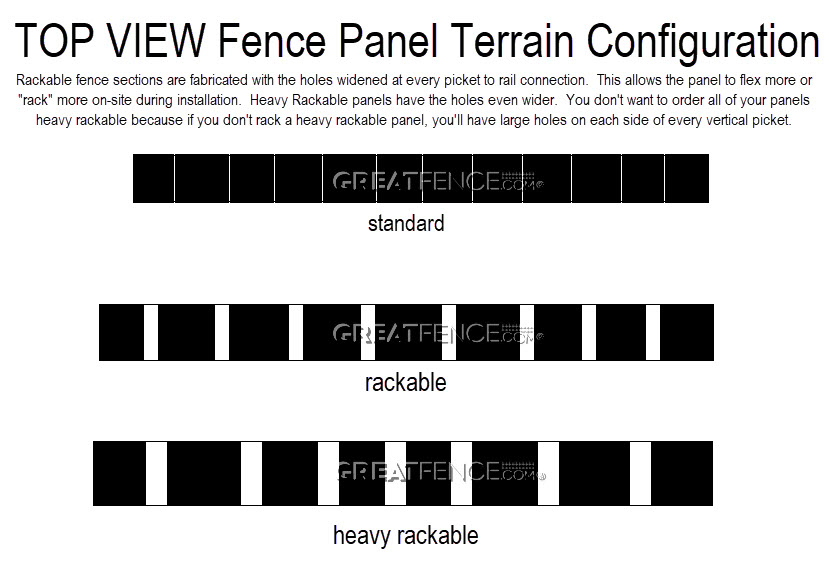
What you want to do, when configuring and ordering aluminum fence panels, is to look at your property and identify any short spans (6 or 7 foot spans) that have a rise or fall of more than 6 inches. If you do, then you know you will need to order some of your panels: Rackable and/or Heavy Rackable. See the chart, below.
NOTE: Rackable and Heavy Rackable is not available for panels with Rings or Puppy Pickets or for for Flat Top Double Pickets (Style 7) and Spear Top Double Pickets (Style 8) because of the double pickets.
So, how do you install the above exceptions on a sloped area or hill? By Stair Stepping the fence sections.

Standard Configuration
| Recommendation(s): | Automatically Included: | Purchase Locally: |
| 11 – 6′ wide fence panels, trim width on site, 10 – Line Posts and 2 – End posts. | Standard Post Caps for your posts Panel to post connection hardware Posts / Mounts sold separately | Cement for in-ground posts, or Anchor bolts for welded plate. |
Rackable

| Recommendation(s): | Automatically Included: | Purchase Locally: |
| 3 – 5′ wide fence panels, 2 – Line Posts and 2 – End posts. If you’re continuing the run at the top of the 15 foot run, you would put a line post there and continue the barrier. So, really, it’s 3 – Line Posts and 1 End Post depending where the fence run end | Standard Post Caps for your posts Panel to post connection hardware Posts / Mounts sold separately. | Cement for in-ground posts, or Anchor bolts for welded plate. |
NOTE: Rackable and Heavy Rackable is not available for panels with Rings or Puppy Pickets or for for Flat Top Double Pickets (Style 7) and Spear Top Double Pickets (Style 8) because of the double pickets.
So, how do you install the above exceptions on a sloped area or hill? By Stair Stepping the fence sections.
Heavy Rackable
| Recommendation(s): | Automatically Included: | Purchase Locally: |
| 1 – 6′ wide fence panel – Heavy Rackable, 2 blank, non-punched posts, 4 Vertical Swivel Mounts. | Standard Post Caps for your posts Panel to post connection hardware Posts / Mounts sold separately. | Cement for in-ground posts, or Anchor bolts for welded plate. |
NOTE: Rackable and Heavy Rackable is not available for panels with Rings or Puppy Pickets or for for Flat Top Double Pickets (Style 7) and Spear Top Double Pickets (Style 8) because of the double pickets.
So, how do you install the above exceptions on a sloped area or hill? By Stair Stepping the fence sections.